Configuring OTP SafeNet access in MAG device

First of all, There should two servers, SafeNet & LDAP/Radius server which is including all usernames and passwords. And SafeNet server should be configured to establish sync with LDAP/Radius server in order to pull out all usernames/password.

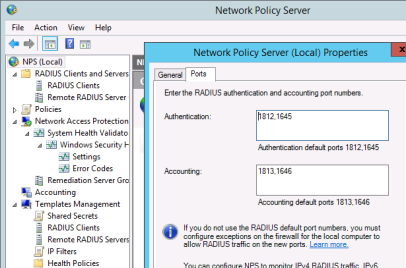
Second, check with which ports OTP is listening:

1

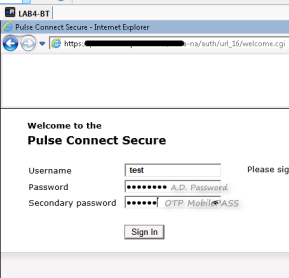
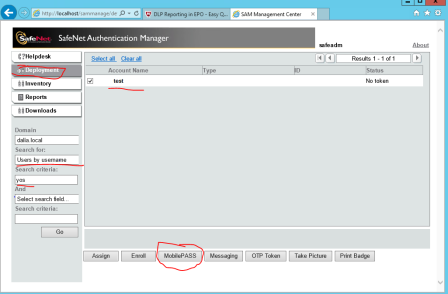
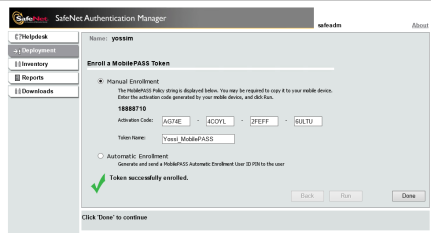
Now we should activate the username who’s going to establish the VPN connection via OTP .

2

3

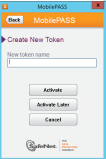
Now we need to type the activation code received by the application:

4 >> 5 >> 6 >> 7

8.png

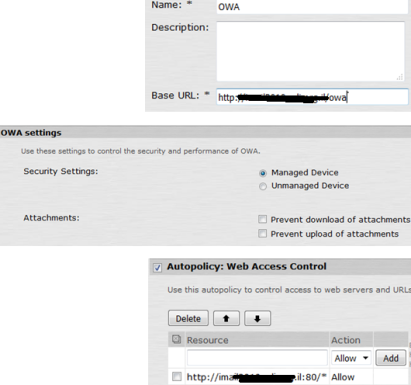
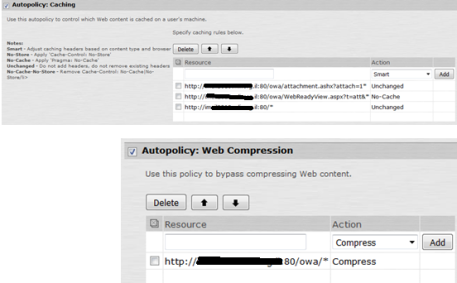
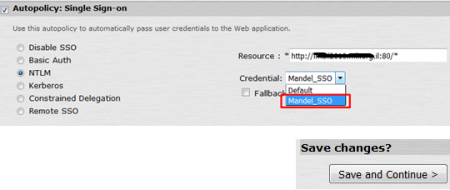
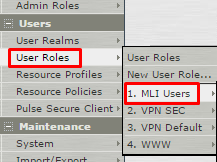
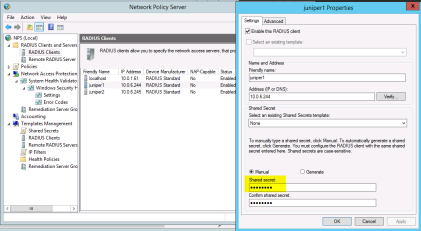
Now this is how to configure the OTP connection in the MAG:

9

10

  • The shared secret is what you determine in the OTP server settings, e.g SafeNet

13

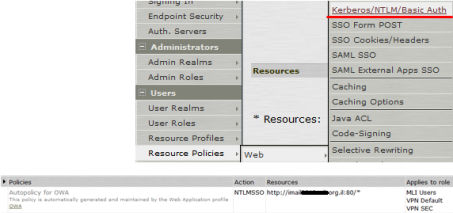
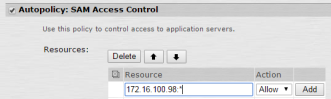
Now you configure realm with correct authentication methods:

14

And all other roles and page policies …

16

Pulse Secure: Your browser is not supported in this component

screenshot_5

This is a description to solve this problem in KB : KB28018

But beside that , lets talk about another situation were this error message might appear.

This error message will also appear when you’re trying to configure both VPN Tunneling and WSAM in the same rule and trying to connect via NC screenshot_1

For example:

screenshot_2

screenshot_3

PulseSecure-Generate report about who logged with VPN in a certain period

In new versions such as 8.2R4 , you can easily export it under a new tab that has been added called “Reports”

11

In versions 8 and below there is a need to run a filter with query :

Goto System> Log/Monitoring > User Access > Filters.
Create New Filter.
Query:
Start Date: (Select Month, Date, Year)
End Date: (Select Month, Date, Year)
Save changes.

NOTE: Select start date and end date as per your requirement.

Then navigate to System> Log/Monitoring > User Access > Log.
View by Filter: (Please select the new filter which you created)
Edit Query: (Please enter the below ID’s as per your requirement)

id=’AUT24326′ (To find the Users authentication successful)
id=’NWC23464′ (To fine the VPN tunneling session started )
id=’NWC23465′ (To fine the VPN tunneling session ended )

111

Click on Update .

Note: in ‘start date” you well see the year which the corrent version has been released. which means if we’re in 2016 and you still using version 7.4R8 you can start only from 2014 , and you can’t start from 2016 . In such cases you need to upgrade the device. As a workaround and I’m not sure if it will work , you can change the date maually X-years foward : (System –> Status –> Overview –> “System Date & Time” –> click “Edit” –> Time Source –> ” Set Time Manually”).

SSO

In Juniper SA Series, there is an option to give a secure connection to corporate networks without the use of network connect .

In this example I’ll demonstrate how can we do this with OWA server .

Screenshot_11

Screenshot_12


Screenshot_13

Cashing: To control what browser contents temporarily stored (cached) on the client machine. Which web content the client’s computer will do cashing to it . Usually listed above are generated Automatically , so there is no need for our intervention in the configuration.


Screenshot_14

Screenshot_15

Now add the Realms to the SSO , then you can see that an autopolicy created:

Screenshot_16


WSAM

  1. Creating the WSAM profile

Screenshot_1

Screenshot_2

JSAM is likely more for Apple users.

At this example I will demonstrate how to enter exchange through outlook

Screenshot_3 Screenshot_4

If you wonder why I typed (*) which means (all ports), that because we’re talking about a lot of ports, not only SMTP port .. if you have another helpful idea please put that in a comment .

Don’t forget to click on Add button , and then save and continue .

2. Adding the WSAM to a role :

Screenshot_5

Screenshot_6

As you noticed, it created automatically “Supporting Policies”. But if we created the WSAM by “Resource Policies”, then we’ll be have to create a profile, and associate then to each other (complicated) ..

If we configured something wrong in WSAM , this error message will be generated:

Screenshot_7

We can also add the application by the User Roles> Access features> Applications

Screenshot_8  Screenshot_9Screenshot_10

Note that we add the application same as it shows in the Task Manager