FTP from SRX

admin@SRX> ftp 172.16.1.17

Oct 18 14:36:55

Connected to 172.16.1.17.

220-FileZilla Server 0.9.60 beta

220-written by Tim Kosse (tim.kosse@filezilla-project.org)

220 Please visit https://filezilla-project.org/

Name (172.16.1.17:admin): <type here the username if not admin>

331 Password required for cloud

Password:

230 Logged on

Remote system type is UNIX.

ftp> put /var/tmp/Flow_PCAP.ge-0.0.4 Flow_PCAP.ge-0.0.4.zip

local: /var/tmp/Flow_PCAP.ge-0.0.4 remote: Flow_PCAP.ge-0.0.4.zip

200 Port command successful

150 Opening data channel for file upload to server of “/Flow_PCAP.ge-0.0.4.zip”

100% |**********************************************************************************************************************************************************| 12403 KB    –:– ETAA

226 Successfully transferred “/Flow_PCAP.ge-0.0.4.zip”

12701026 bytes sent in 3.38 seconds (3.59 MB/s)

ftp> bye

221 Goodbye

Security Director – Service Temporarily Unavailable

1- Folllowing KB3302, Still, the slipstream service does not start after manual start. So,  moving to step 2.

2- Contact JTAC and they advised to change the following as they suspect the /var/log is full because of the audit logs . So, we needed the clear the space by changing some configurations in the auditd.conf  file:

1. Change directory :  cd /etc/audit

2. Edit file: vi auditd.conf

3. Type i to enter insert/editing mode.

4. Make changes as stated nellow:

max_log_file_action = KEEP_LOGS >>>>>>replace KEEP_LOGS with ROTATE

space_left_action = SYSLOG >>>>>>replace SYSLOG with ROTATE

5. Press Esc to enter command mode.

6. Type :wq and press ↵ Enter.

7. Restart audit daemon: /etc/init.d/auditd restart

8. Start slipstream service after this: /etc/init.d/ slipstream start

Note: use chmod command if you don’t have permissions.

Note: Contact JTAC before doing any changes as yours might be a different situation.

Connection to node0 has been broken

If you need to save new configuration in cluster, and cluster is broken, like this:

admin@SRX# commit
node1:
configuration check succeeds
error:
Connection to node0 has been broken
warning: pull configuration failed, fallback to push configuration method
error: remote load-configuration failed on node0
error: remote unlock-configuration failed on node0

Then there is a hidden command you can run:

{primary:node1}[edit]
admin@SRX_Marvad_Backup# commit synchronize force
node1:
commit complete


Installing SRX345 in cluster mode

2018-09-18_10h32_58

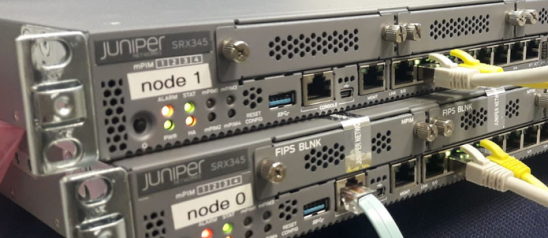
So I just finished configuring 2x SRX345 in cluster mode and here are some of the challenges that I had to face when trying to convert old configuration from old SRX platform and some tips I learned through the maintenance:

  • There is no more VLAN  nterface . If you want to configure VLAN interface then it should be irb interface .
  • The fxp0 interface has a dedicated port , and it’s named MGMT . The first port after the console .
  • The is no problem to configure cluster of SRX345 that has one power supply and one that has two power supplies. That hardware does not matter . What does matter is the platform it self , As both should be SRX345.

Conflict between SD 17.2R1 and ND3.2

Hi

So after installing JS and SD (both version 17.2R1) I tried to install ND3.2 .

Installation shows good results in the Jobs section but the ND didn’t show up in the left menu.

So, after TAC review, there was some conflict between SD 17.2R1 and ND3.2 due to which deployment of the .ear files fails. So we needed to upgrade the Security Director to 17.2R2 first. And then executing the below command in Space CLI of VIP node:

/usr/local/jboss/bin/jboss-cli.sh –connect –controller=jmp-Cluster “deploy /usr/local/jboss/standalone/deployments/11/cm.ear –server-groups=platform”

** if you had the same issue, my advise to you, don’t run to run this cammand, it might be risky.. Open a JTAC case and let them review the issue.

Junos Space Traffic Graph for SRX interfaces

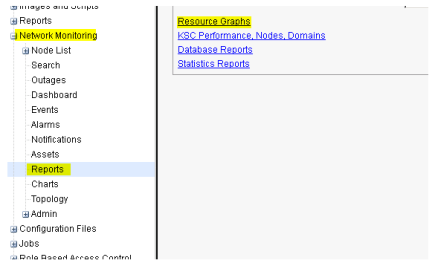
Navigate to the classical Junos Space view

Then “Network Monitoring” > “Reports” > “Resource Graphs”

Capture11

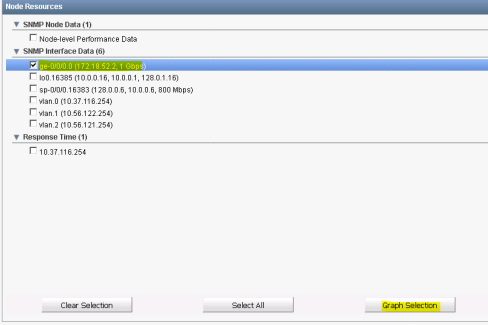
Then search the device you want to view its traffic graph, then select the interfaces (of click graph all) , Then Graph selection:

Capture11

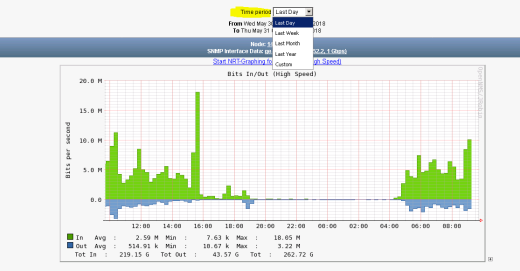
You can change time period of the graph as you wish:

Capture11

Tip: You can click on “Start NRT-Graphing for Bits In/Out (High Speed)” to view live data

Connecting Microsoft Radius Server to Junos Space

Basically, we need to do 3 steps in order to accomplish this task:

connecting the MS radius server to junos space. And this step is divided into 2 another steps:

a. Creating radius client:

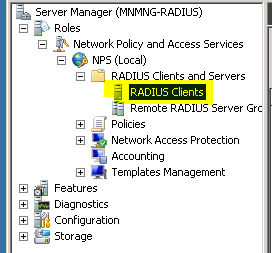
Go to RADIUS Clients > right click > new

11

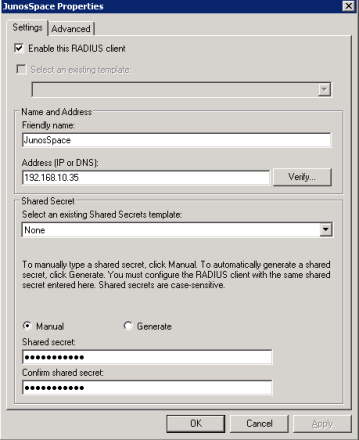
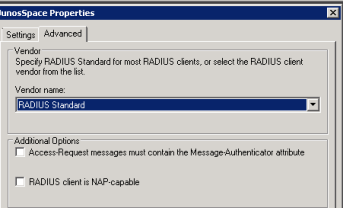
Type the IP address of J-Space (the one you’re using with CLI , not the virtual one) and type the shared secret you want to use.

12

11

b. In the J-Space go to Administration > Authentication Servers > add the radius IP address and all properties you want to use

notice: remember which protocol you’re going to use because you’ll be configuring that later in the radius server

11

Test the connection and then proceed

Second step is to configure remote profile. You’ll be creating remote profile to set permissions for remote authenticated users:

Go to Role Based Access Control > Remote Profiles > Create new

Set the profile name and the permissions you want to give the authenticated users

Remember the profile name because you’ll be using that in the last step.

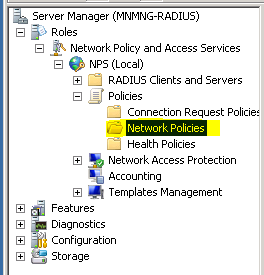
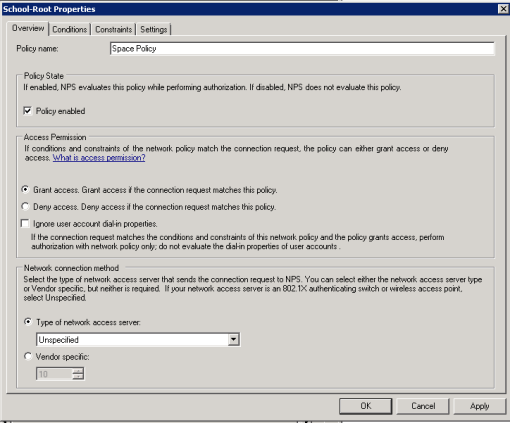
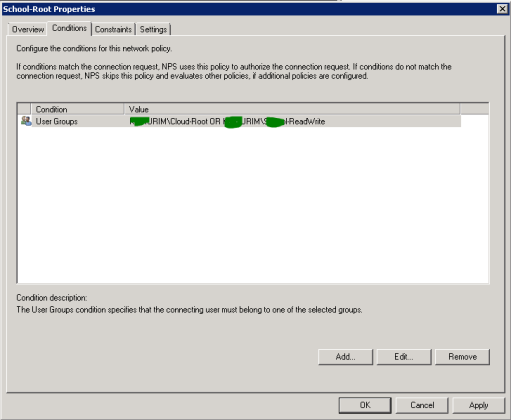
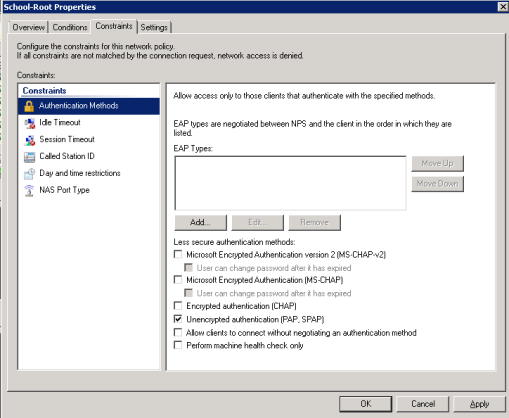
Last step is to create network policy in the radius server:

Go to:

12

Capture

add the group users name which they should grant access to the J-Space

11

11

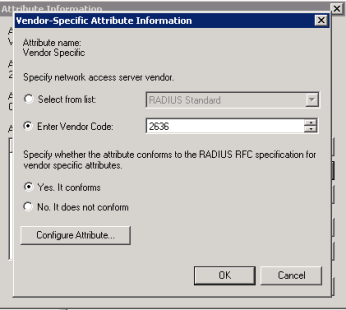
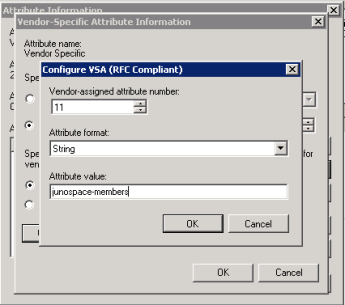
And now the important part: Vendor Specific

Junos code is : 2636

Attribute number : 11 , string

refer to : https://www.juniper.net/documentation/en_US/junos/topics/reference/general/radius-vendor-specific-attributes-juniper-networks.html

Attribute value should be the same remote profile name you’ve configured in the J-Space remote profiles.

12

11

If the authenticated user is part of a domain then in the J-Space login page you should login in this context: Domain\User

Deploying Log Collector in Junos Space

You well connect the log collector to the Security director after downloading the OVA and installing it in VM machine and configuring the network settings .

You may not type 6 and change the default user/pass for connecting the log collector .. but if you want then then just remember the password you entered.

default user/pass: admin/juniper123

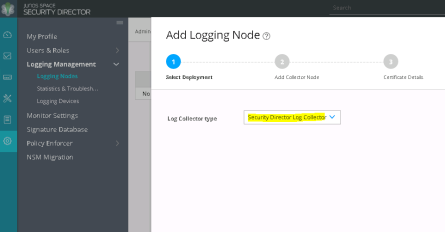
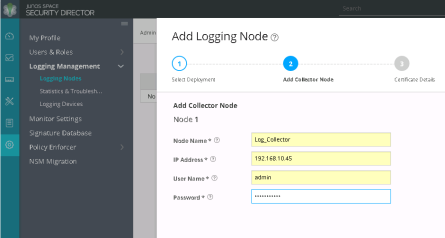
Go to Administration > Logging Management > Logging Nodes > Create

1

1

Next > Finish

1

If you receive “Log Collector is not in Time Sync” then 2 things:

1- check if the log collector and junos space machines both has ntp port 123 open in firewall toward the ntp server.

2- check if you have configure the right ntp server in /etc/ntp.conf file . if not then:

stop the service : /etc/init.d/ntpd stop

update the ntp server settings in the file

for the update : ntpd -gq

start the service : /etc/init.d/ntpd start

In order to collect the logs into the log collector , you’ll need to configure the log collector IP address in the junos firewall and it should be reachable. For example:

admin@Firewall> show configuration security log stream Log-Collector
severity info;
format sd-syslog;
category all;
host {
192.168.10.45;
}

Untitled

STRM disk space

Capture

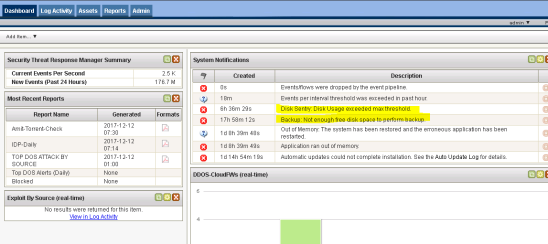
So sometimes we can view such those logs in the STRM ..

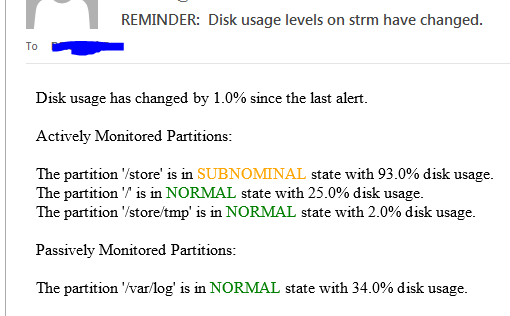
Moreover you also might receive an email notifiation from STRM saying the same:

Capture

According to:

Click to access strm-troubleshooting-guide.pdf

Pages: 16-17

Lets use this command in the CLI: df -PTh /store/backup

Capture

And what I do to clear files up , is connecting via WinSCP to the STRM machine and then cleaning the files which claimed to be the issue in the link I shared. (see page 17)

So in the /store/ariel/events I can see on each those two folders “uncompressedCache + payloads” files from 2014/2015/2016 … those files I don’t need actually So I’m gonna copy it as a backup to my desktop then delete it from STRM machine .

In my scenario that was enough to get the STRM work again .. but with other situations you might go all the way with the procedure explained inthe STRM troubleshooting guide.

Configuring IPv6 on SRX firewall

1- First make sure that your SRX is support inet6 flow :

root@Lab> show security flow status
Flow forwarding mode:
Inet forwarding mode: flow based
Inet6 forwarding mode: drop
MPLS forwarding mode: drop
ISO forwarding mode: drop
Advanced services data-plane memory mode: Default
Flow trace status
Flow tracing status: off
Flow session distribution
Distribution mode: RR-based
Flow ipsec performance acceleration: off
Flow packet ordering
Ordering mode: Hardware


f it appears to be in “drop” mode , then you need to enable it and reboot the device :

root@lab# set security forwarding-options family inet6 mode flow-based
root@lab# exit
root@lab> request system reboot

After reboot:

root@School-Lab> show security flow status
Flow forwarding mode:
Inet forwarding mode: flow based
Inet6 forwarding mode: flow based
MPLS forwarding mode: drop
ISO forwarding mode: drop
Advanced services data-plane memory mode: Default
Flow trace status
Flow tracing status: off
Flow session distribution
Distribution mode: RR-based
Flow ipsec performance acceleration: off
Flow packet ordering
Ordering mode: Hardware

2- Configure IPv6 on interface :

set interfaces ge-0/0/15 unit 0 family inet6 address 2001:2222:1111:e00::d11/56

3- Static route :

set routing-options rib inet6.0 static route ::/0 next-hop 2001:2222:1111:e00::1